Grease builds fast, then fixes dust into a dull film that hides grain and corners. A careful routine lifts residue while protecting the finish, so cabinets keep their warm color and tight joints. Start with gentle chemistry, tight moisture control, and short, regular sessions. With calm steps—wipe, wash, rinse, dry—you restore glow without scratching or swelling panels. The process is simple, the tools are basic, and the results last through busy weeks and holiday cooking.
Wood movement, finish layers, and safe preparation
Wood swells with steam and shrinks as air cools, which can trap grime at profiles and pulls. Excess water seeps under edges, leaving rings or raised seams. Keep cloths barely damp and pressure light. Around the range, a weekly pass limits buildup; plan a deeper interior-and-exterior clean once or twice a year to keep cabinets even.
Lacquer or polyurethane creates a barrier that resists stains; however, harsh cleaners and abrasives can cloud that film. Painted surfaces demand extra care, since micro-abrasive pads scuff sheen quickly. Skip Magic Erasers on painted faces. Because older coatings may have thinned, test any solution on a hidden spot before broad use.
Moisture management matters. Work along the grain, so loosened soil leaves without grinding grit in. Wring cloths hard, refresh your water when cloudy, and dry edges immediately. These small moves reduce warping risk, preserve clear color at rails and stiles, and make future sessions faster because residue never has time to set hard.
Step-by-step degreasing that protects cabinets
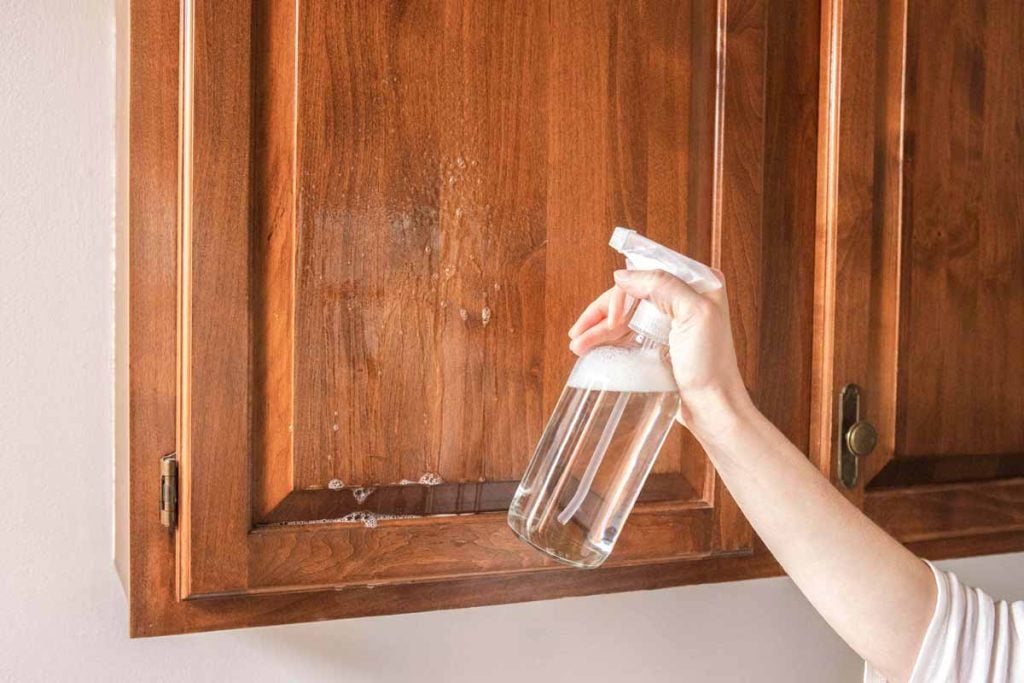
Mix a mild bath: a few drops of liquid dish soap in warm water. Dip a sponge or microfiber cloth, then wring until nearly dry. Glide with the grain using light pressure, and chase residue from corners with a soft toothbrush. Replace the solution as suds fade so soil doesn’t redeposit.
Rinse using a clean, damp cloth until no slickness remains, then dry completely with a fresh towel. For heavier film, add one-quarter to one-half cup of distilled white vinegar to the bowl. Because some finishes react, always test first; if a spot clouds, return to the soap-only mix and gentle passes.
Finish thoughtfully. A whisper of olive oil or a touch of beeswax restores luster and adds a soil-shedding layer. Buff until fingerprints disappear, not until surfaces look glassy. Hardware deserves attention as well: snug, not overtightened, so doors hang true and cabinets avoid rub marks along meeting edges.
Tools, mixing, and the quick kit you’ll rely on
Keep setup simple and repeatable, because a ready kit makes upkeep easy. Place a small caddy near the kitchen for fast access and shorter sessions. While workflow matters, the specific supplies do, too; stick with mild soap, soft cloths, and non-abrasive tools that won’t cut through the finish during routine care of cabinets.
What You Need :
- Liquid dish soap (such as Dawn)
- Bowl of warm water
- Sponge
- Soft microfiber cloths
- Toothbrush
- Distilled white vinegar
Because some protective films thin over time, test cleansers in a discreet spot. Vinegar can dull certain coatings. Painted wood requires products labeled safe for painted materials, and micro-abrasives should stay off those faces. With the right tools prepared, sessions stay short and outcomes stay consistent, week after week.
Prevention habits that keep cabinets cleaner longer
Grease mist settles in minutes; therefore, run the range hood any time pans heat. Use lids or a spatter screen to tame bursts from frying and sauces. After messy prep, a quick wipe on handles and edges keeps residue from curing at warm metal, where it pulls dust back onto clean surfaces of cabinets.
Act early and protect strategically. Wipe spills immediately so sugars and starches never harden. Apply a thin coat of polish or wax as a barrier where fingertips land most. Spread wax paper on top runs to catch mist and dust, then replace it when grimy. Inside, shelf liners catch crumbs and block stains.
Consistency wins. Give high-heat zones a weekly pass, rotate through quieter areas as needed, and vacuum interiors during those deeper sessions, so loose grit doesn’t scratch faces later. Keep cleaning gentle, brief, and rhythmic; small doses of care prevent heavy scrubbing and preserve color uniformity across doors, frames, and panels.
Stain removal, vinegar cautions, and a finish-friendly finale
Some marks outlast washing; lift them with a baking-soda paste. Mix two parts baking soda with one part water, spread on the spot, and wait five to ten minutes. Brush lightly, wipe with a damp cloth to remove paste, then dry thoroughly. This controlled abrasion lifts color without cutting the protective film on cabinets.
Use the vinegar boost only when needed, and only after testing. Because finishes vary, a safe result in one spot may not guarantee safety elsewhere. Work top to bottom, so drips never cross clean zones, and keep strokes overlapping and light. Fresh water prevents haze, while patience preserves clarity in the grain.
End with restraint. A thin touch of beeswax or a dot of olive oil brings a soft glow and helps soil release next time. Buff lightly; avoid a slick, glassy look that shows prints. Re-seat hardware, align reveals, and confirm doors close true so edges stay quiet and finishes stay intact.
Sustained shine comes from gentle rhythm and smart precautions for busy kitchens
Clear results come from simple moves done regularly. Lift dust, wash with mild soap, test vinegar before boosting, rinse clean, then dry until edges feel crisp. Add a small layer of protection and rely on airflow while cooking. With that steady routine, cabinets remain clean, even-toned, and easy to maintain through the seasons.